

So I’m thinking of talking a little bit more freely around here about some of our process and why we’ve settled on doing things the way that we do (hi it’s me, Winter writing this post hehe).
I know this is a belated sort of topic as the Enamel Pins Craze winds down for a lot of folks in the Artist Alley & online shop spheres of independent trinket making. But I don’t think this type of trinket is going to go entirely obsolete. They’re just becoming a bit of a new staple for folks creating original works.
Sorry we’re not gonna talk about fanart here. Neither of us has spent enough time indulging in fanworks to have formed opinions about it admittedly! We’ve both been more interested in creating our own original works for a long time now and have been out of the fanart game for too long!
Take every single thing I say here with a grain of salt. I have over a decades worth of experience in the con circuit and have been making enamel pins since the craze began– HOWEVER– these are all personal thoughts, feelings and insights I’ve gathered over the years and work for me as an artist and for Windy & Wallflower as it develops its aesthetic~
Hopefully this post gives you a little insight into our decision-making process~
For The Makers!
So what the hell are Enamel Pins? You might be asking (or maybe you’re not asking this because you, like me, already have a honking collection of your own at home and are still struggling to figure out what to do with all of them–I have suggestions for those who are collectors but I’ll get to that later~). Whatever the case, you’re interested in making one and/or are curious how other creatives are making their own.
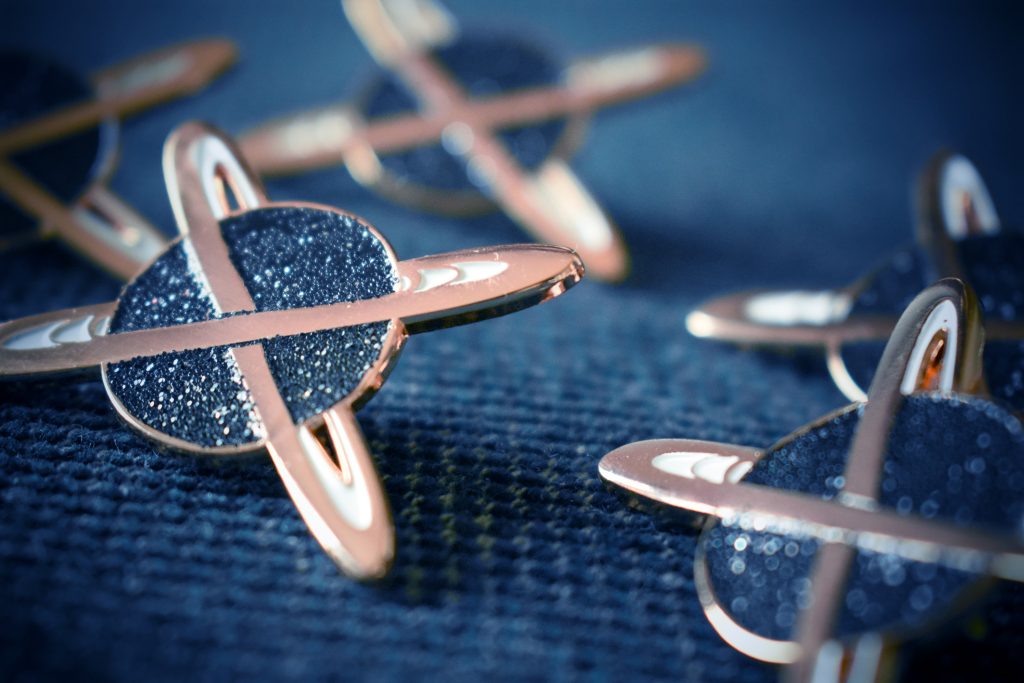
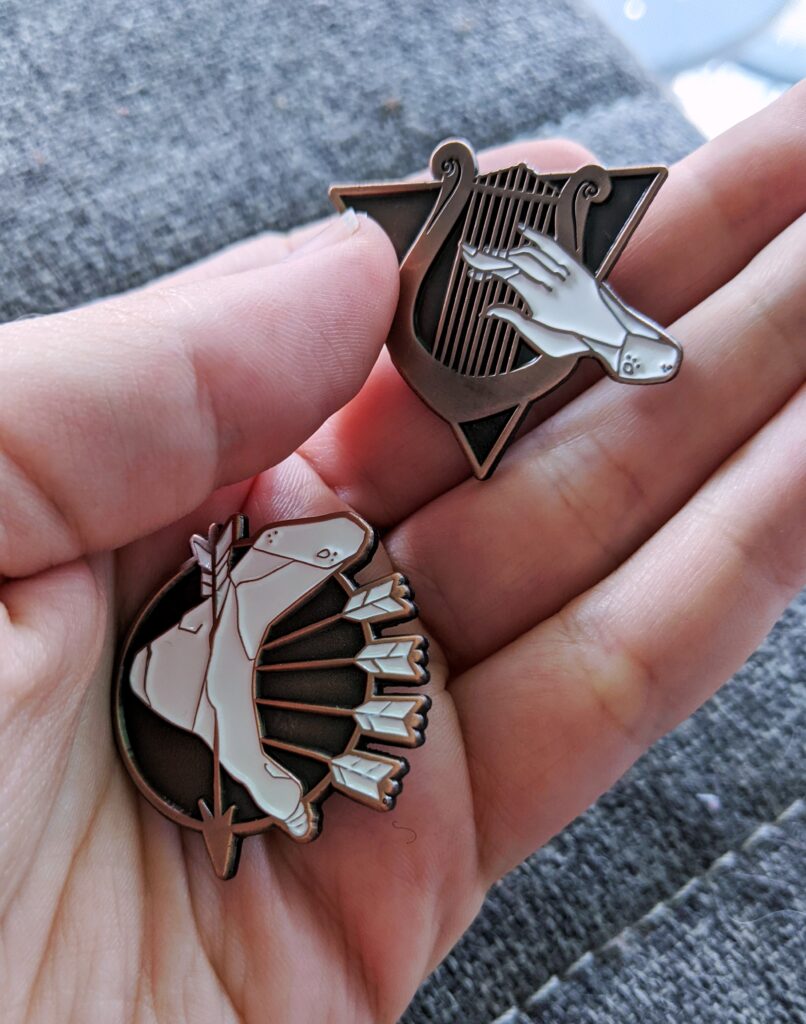
So lets start with the basics, enamel pins are small metallic trinkets with one or two sharp points in the back to stab through cloth with some sort of backing to affix them into place.
Like these:
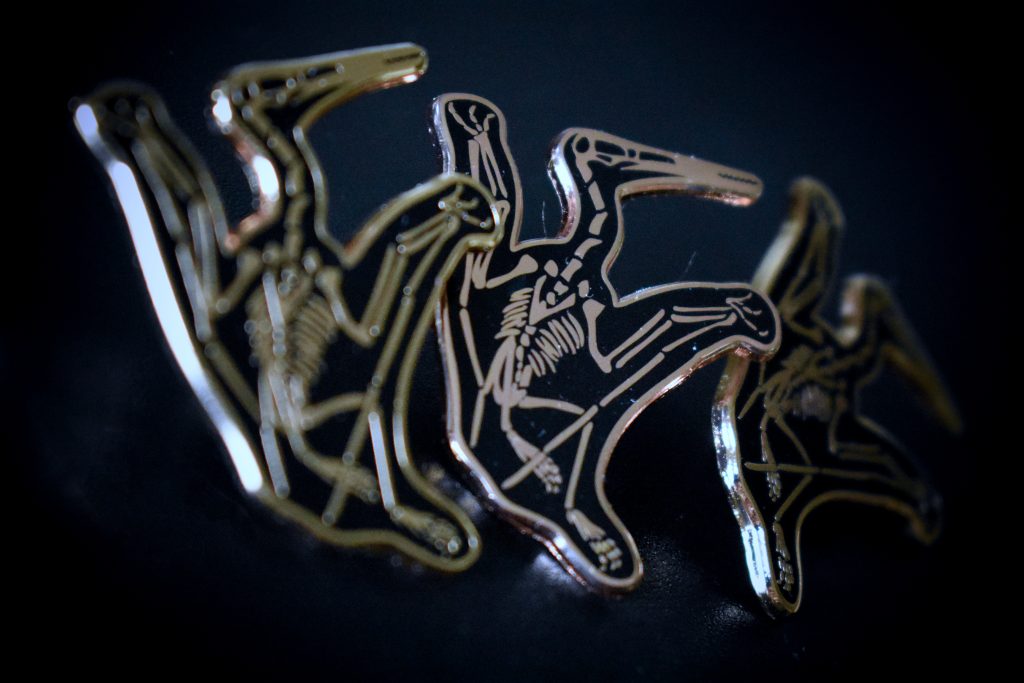
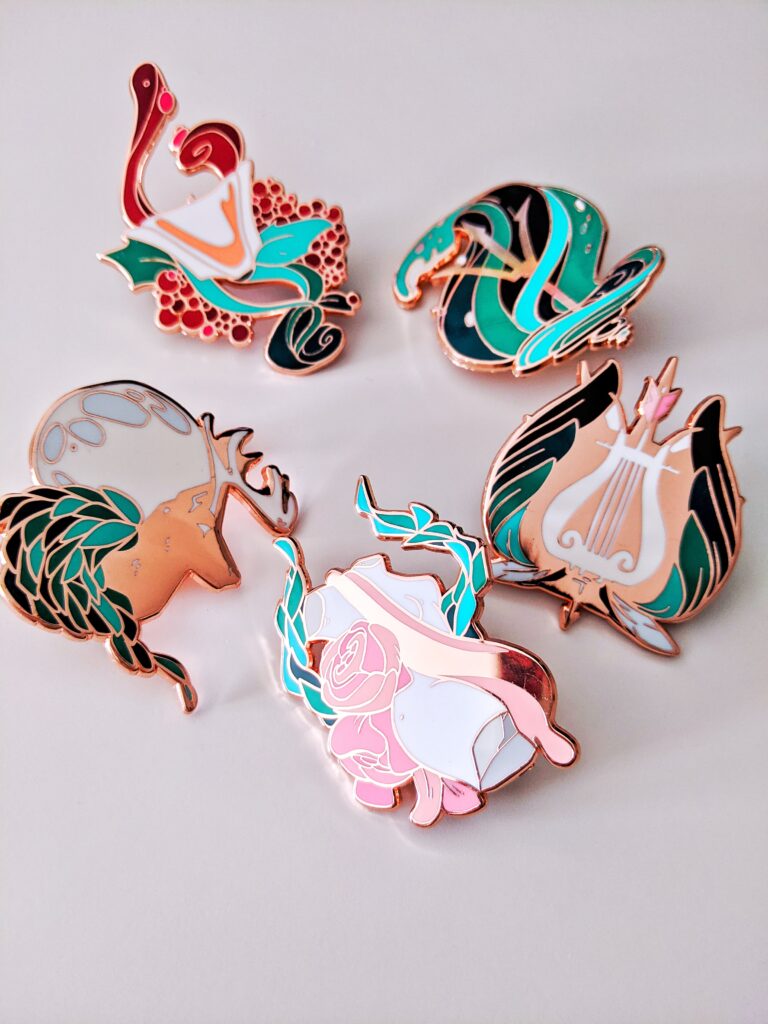
Yes, we’re going to be using our own examples, did you know you can snag any of these on our shop? Go on and take a peek.
Enamel pins come with 3 major decisions in the pin creation itself. You’ll want to go into creating your pin with 3 decisions to be made in mind:
- Hard Enamel or Soft Enamel?
- What kind of metal finish?
- Which backing is right for you?
Hard vs. Soft ( ¬‿¬ )
I think pretty much all but two of our designs are what we call, hard enamel which means that the enamel (or the non-metal fillings) are flush with the metal mold. Soft enamel is generally the second option here and that involves the enamel not being filled to flush with the metal and leaves a more textured look to your pin! Honestly, these types of pins feel really nice to run your fingers across in my humble opinion.
The real difference between the two types is price. Soft enamel is always cheaper to produce in the long run, but is not generally a look I prefer as an artist. Personally, a lot of my designs are flat and having these divots create extra shadows and shine in a way I personally can’t control in the final look throws me off. I find, sometimes these types of pins can also give off a bit of a cheap look if folks aren’t careful.
That’s not to say that soft enamel pins aren’t without their merit! I think some artist’s styles really make them shine and make them look absolutely sick. It’s a hard look to make work and I struggle personally to make my art style pull it off in a way that I like. But I have collected a few of these myself that I absolutely adore.
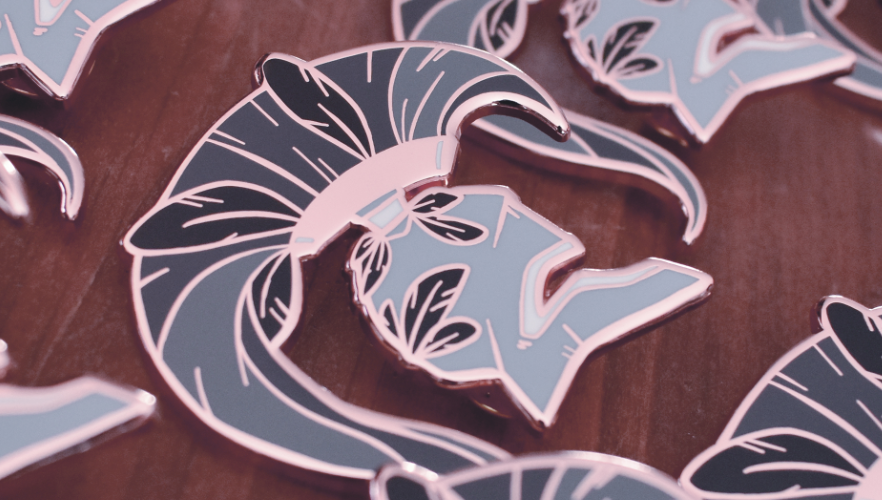
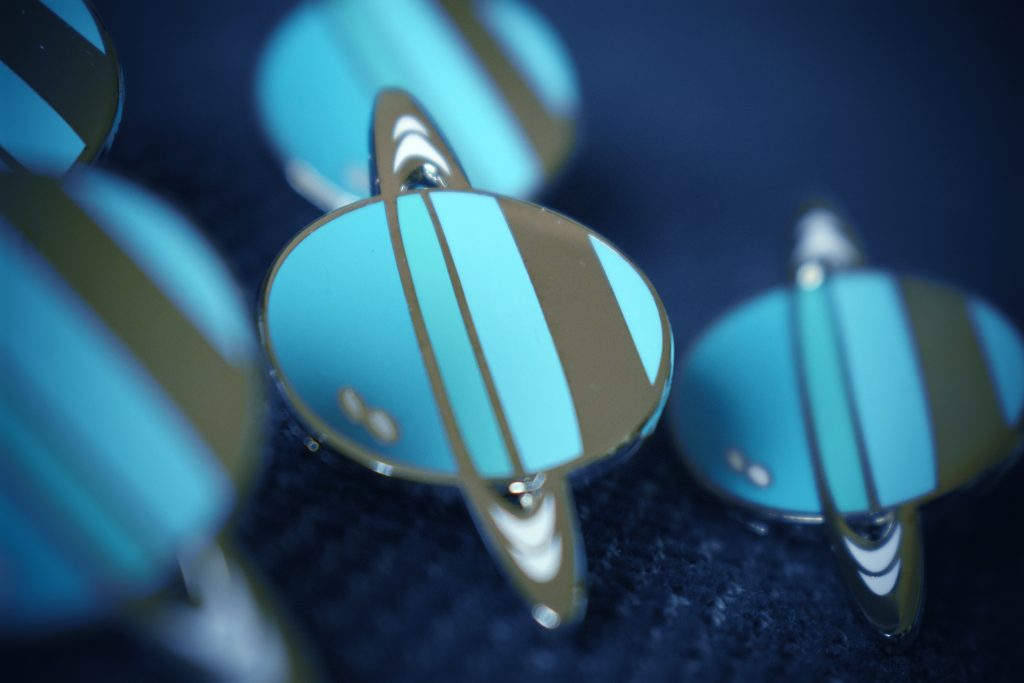
Here’s what the few soft enamel pins in our collections look like:
The real reason we wound up with soft enamel in these cases is because one (or more) element offered in these scenarios was not compatible for hard enamel as an option. Which means, soft enamel is also a LOT more flexible for some folks to play with!
There are also special types of enamel that can be selected in the creation process, not all of these are amenable to hard enamel so you’ll have to keep this in mind. But you CAN get glitter and glow in the dark options for your pins! You’ll have to talk to your supplier to see what is feasible for them. The one we work with was kind enough to explain why and provide examples of why certain combinations do not mix well.
Precious Metals
Okay so you’ve decided whether you want hard or soft enamel… I hope you’re not beholden to that choice because now you get to choose what kind of metal you want to … and some of these metals play real nice with the enamel type you chose… but some might not!! YAY!!
Okay so lets make a list of a lot of aaaalll your options (or at least the most common I’ve seen):
- Shiny Gold
- Shiny Rose Gold
- Shiny Copper
- Shiny Nickel (looks silver)
- Gunmetal (very dark grey)
- Antique or ‘Brushed’ (comes in most of the above options)
- Two-Tone
- Anodized Metal (Rainbow look)
- Painted Metal
Almost all of these have their own caveats so let me break them down for ya.

Shiny Gold/Rose Gold: Honestly these are probably THE staples. They are robust, they look clean and have a nice sheen. They interact with hard enamel gorgeously. You can also get these with soft enamel. Versatile, durable. A good chunk of Windy & Wallflower pins deal with Shiny Gold/Rose Gold so this metal style is a clear winner for me. 10/10.
Shiny Copper: I’ve created one pin in this style because I just really like a more red/orange tinted metal for its warmth. Copper works well but over time it will anodize and tarnish if the people who buy your pin tend to wear them on jackets. Its not a bad thing. I think wear & tear on a copper pin can look really cool. Its definitely something to keep in mind though! 6/10.
Shiny Nickel: I shouldn’t hate this one as much as I do but here we are and I’m hating on it. I love the look & feel of a more silver-y pin but this type of metal sucks a bit of the colour out of your enamel colour choices. Its a hard metal to pair. It also is the type of metal that just creates a lot of B grades. I don’t know if that’s just an achilles heel for the manufacturer we use specifically but every time I’ve ordered these a good 30% of them wind up in the discount pile for defects. (Most orders have more of a 10-15% defect rate, and admittedly our manu recently has dropped it down to less than 5% on most of our orders). 2/10.
Gunmetal or Nickel vs Painted Metals: This and painted black metals seem to fall into the same category but, to my knowledge, Gunmetal nickel can work really well with hard enamel vs painted metals which (I believe) only work with soft enamel. 5/10.

Two-tone: You can pick TWO different types of metals for your pin! Wow Exciting! She’s expensive but if you can account for that it can make a really stellar looking pin. I’ve only done it once before but I am… admittedly aching to try it out again sometime. 9/10
Antique/Brushed Metal: Now we’re getting into metal types that only really play nice with soft enamel. Processing these metals requires the metal to be scuffed in a particular way in order for it to get that antiqued and used look to them. It makes the metal look dark and gives it an absolutely stunning texture in a lot of cases. Luckily, our manufacturer was kind enough to show us why these metals do not play well with hard enamel (most notably with light colours). Essentially this process would smear a lot of the metal work into the enamel and would cause a funky little bleed. If you’re a freak like me, this could look REALLY cool but it also winds up being kind of specific and not exactly a final look you can control. 7/10.
Anodized Metal: It took me forever to figure out what the hell this kind of metal was called. Anodized is the process by which a metal is made to look that cool oil-slick rainbow colour. This is an uncontrollable process, but has some absolutely wild results. I’m still trying to think of a pin design that would look sick in this style but I’m struggling to find a design I’m happy with. I can’t speak to the process, just that, last I checked, it also only plays nice with soft enamel (probably for a similar reason Antique metal only plays nice with soft enamel pins). 8/10.
That’s just about everything there is to say about metals. Its definitely worth taking some time to test them out in your sketches and might even be something you just spend years (like me) exploring and testing out what sort of look you want for your own artistic endeavours!
Let Me Back You Up
Too much? Too much. Lets talk backings.
Luckily… with these there are only three types to choose from as far as I know… But I’ll also talk a little bit about backing cards and packaging if you’ll allow me to indulge a little and bully you about being eco-friendly–Oh yes… we’re Going There.
Types of backings:
- Butterfly (or military) clasps — these are pretty much the default. You pinch 2 little tabs and pull them off.
- Rubber backings — these don’t lock and take a little wiggling to pull off.
- Locking clasps — these are gonna keep that shit STUCK unless the pin-back actually breaks off.
Lets talk a little pros & cons.
Butterfly clasps — these are pretty standard. They’re sturdy and will generally keep things clipped in place pretty well. I’ve had pins on my jean jacket for years and are still affixed in their spots even with a bit of rough tugging and pulling. They’re not infallible though, if you or your customers are particularly rough with your clothing/bags/whatever you pin pins to, they have a chance of falling off with too much fenaigling. If your manufacturer also ships with polybags, they have a higher chance of scratching other pins with big metal surfaces during transit. You’ll be stuck with a couple of b-grades.
Rubber backings — these are …. good for display. And fantastic for shipping. These buggers will not only hold things in place but you don’t have to worry to much about damage and scratching other pins with various shop orders or when you order your pins from manufacturers. The likelihood of your pins being scratched by the backings are muuuch smaller. However, as a buyer, unless these pins are going on display, rubber backings are an evil nemesis for folks pinning things to jackets & bags. We like to order rubber backings on our pins with the manu but offer butterfly clasps for free with each order from our online shop.
Locking clasps — these are a bit excessive in my personal opinion but what do I know. These guys will click and lock a pin into place so if you’re a bit more of a rowdy sort, the only way those pins are coming off is if the pin itself breaks. I haven’t personally ordered these before because they are a bit pricier of an option when butterfly clasps work just as well but definitely something to keep in mind for folks who are interested!
Okay now that you’ve picked your backings, you have a whole pin in your hands, how fantastic is that? How are you going to display this thing? How are you going to sell it?
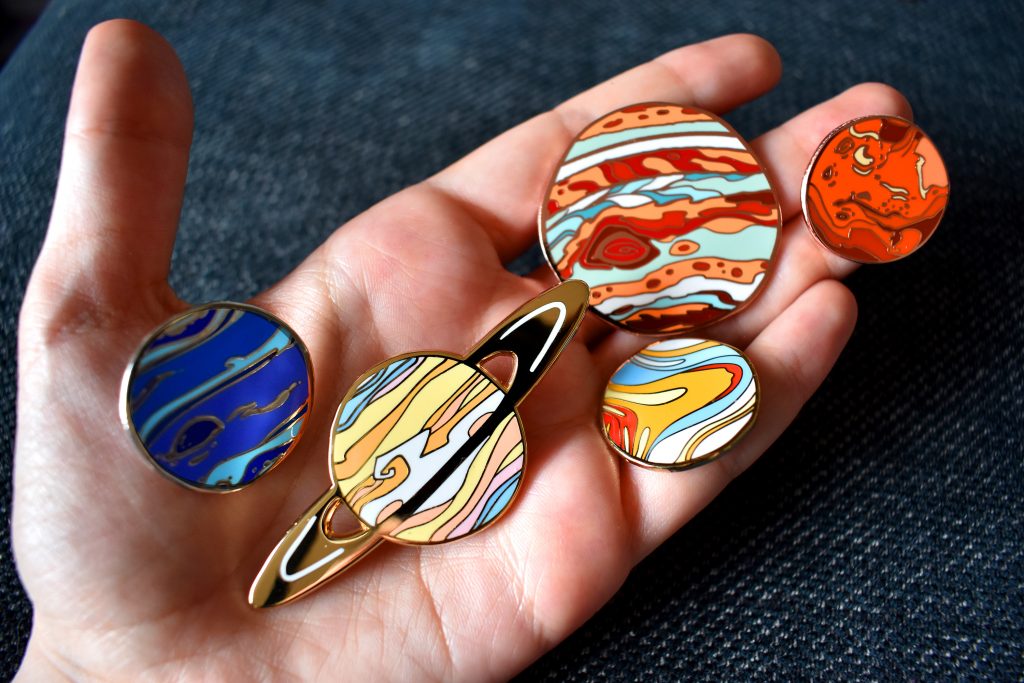
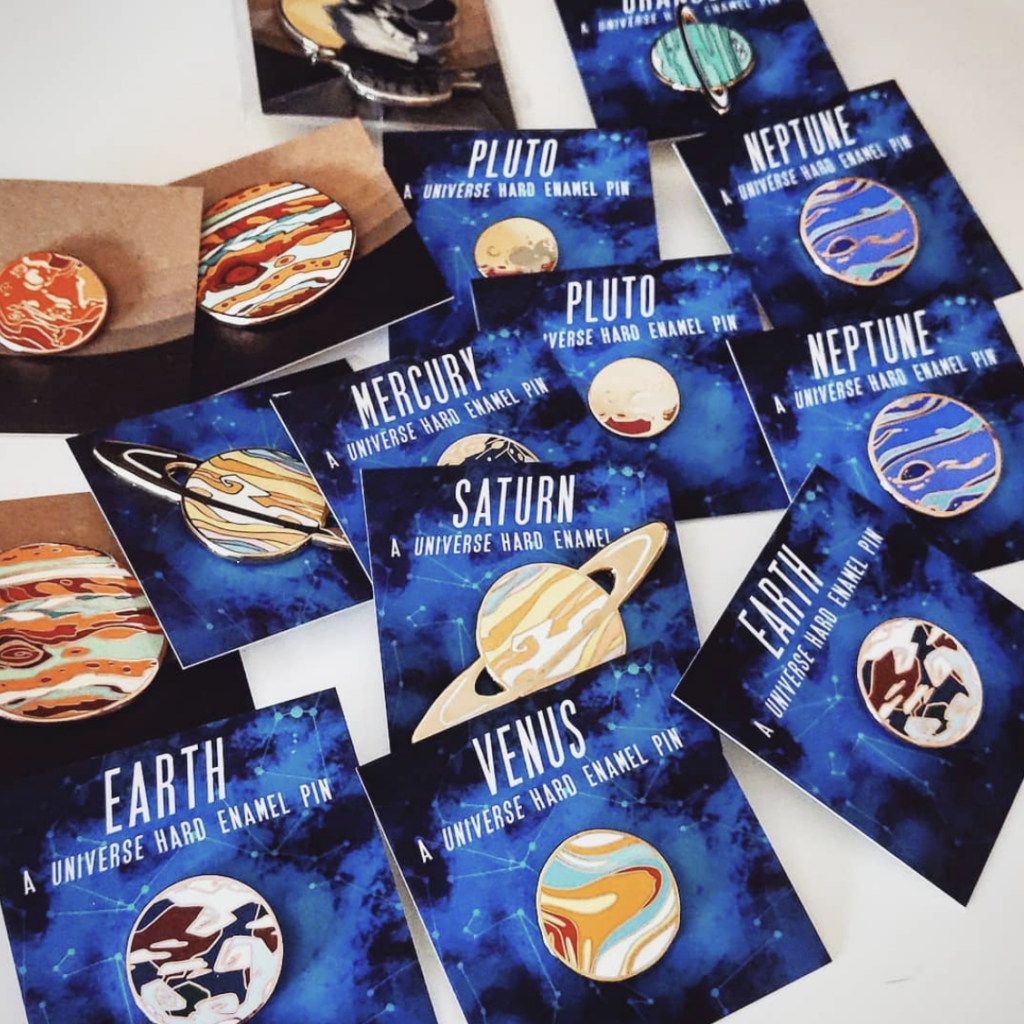
A lot of folks use backing cards & a plastic film for packaging. Honestly? We did it for years because it was a bit of the artist alley & online shop norm. Is it the most effective way to sell a pin? I can’t say. I know some of our pins (the planets especially) benefit from having backing cards to delineate which planet is which. I know folks looking to consign & work with independent local shops are going to want to rely on backing cards too, in order to provide information to the location of your shop & where to find you & your work moving forward. There are a LOT of practical reasons for backing cards.
The two of us have recently shifted away from these personally, I think especially if you use backing cards, folks should definitely take care to use recyclables or compostable materials. I think the plastic sleeves have become a bit of an epidemic at conventions, especially with new plant-based materials that offer the same protection. It’s also worth noting that different cities, provinces & countries have become much stricter about the use of plastics and unnecessary paper products. Its worth keeping that in mind when choosing the packaging for your pins.
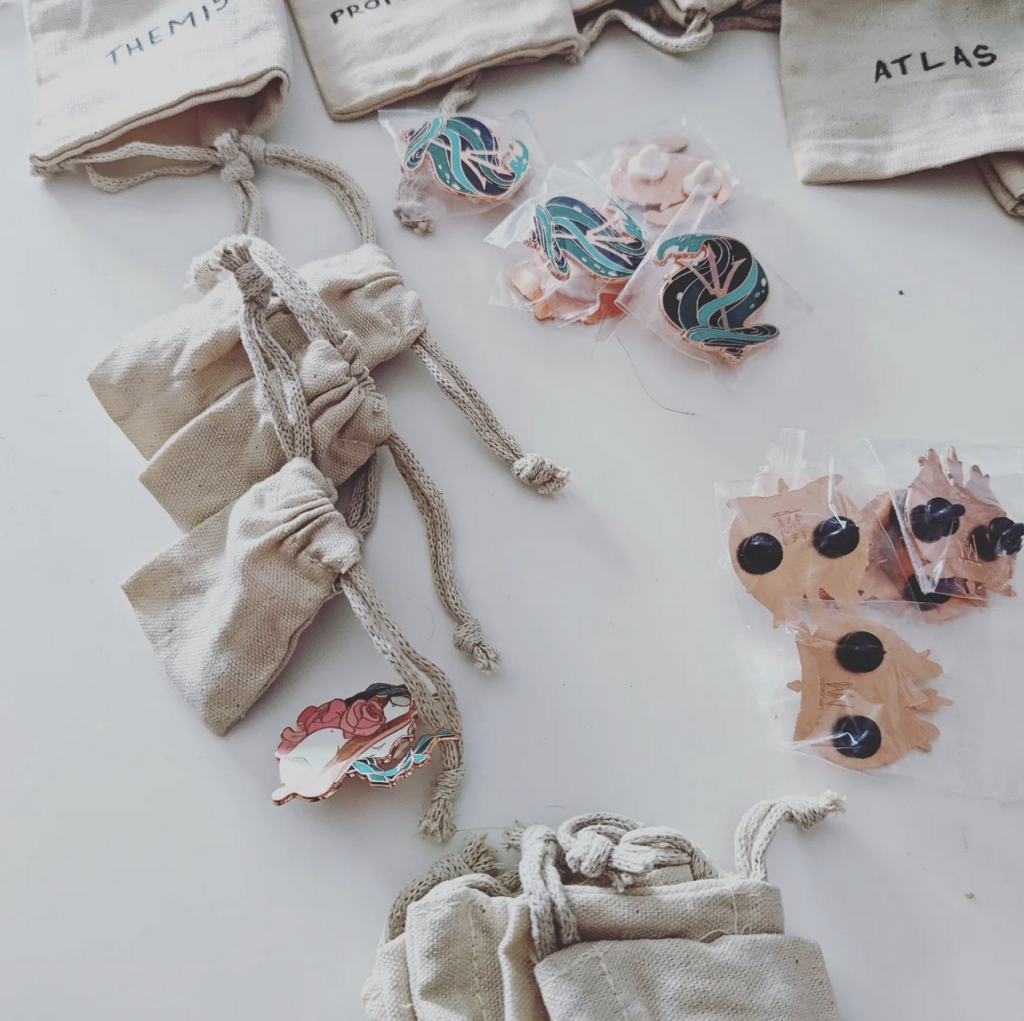
We’re offering insight into a slightly different solution: cotton drawstring bags. They aren’t an end-all-be-all solution but we’ve made the switch recently. We’re looking into a baggie-drop-off solution at conventions for folks who don’t need them but the bags themselves offer re-use-ability for other jewellery. I’ve found folks also just really like the look & feel. The bags themselves can be customised with stamps or with printed logos depending on where they’re purchased and the price to produce these is roughly the same as getting a backing card & plastic sleeve!
Listen, I’m not going to pretend that we are the end-all-be-all ecofriendly judges here. Most merch making and production weighs on the environment in different ways. It’s just definitely worth thinking about our impacts and what small things we might be able to consider while we’re making the things we make!
ANYWAYS. Enough about that. What’s left?
Ouch my money but wow she’s pretty
Sorry my headers are wild but I’m not the best at titles. Shh.
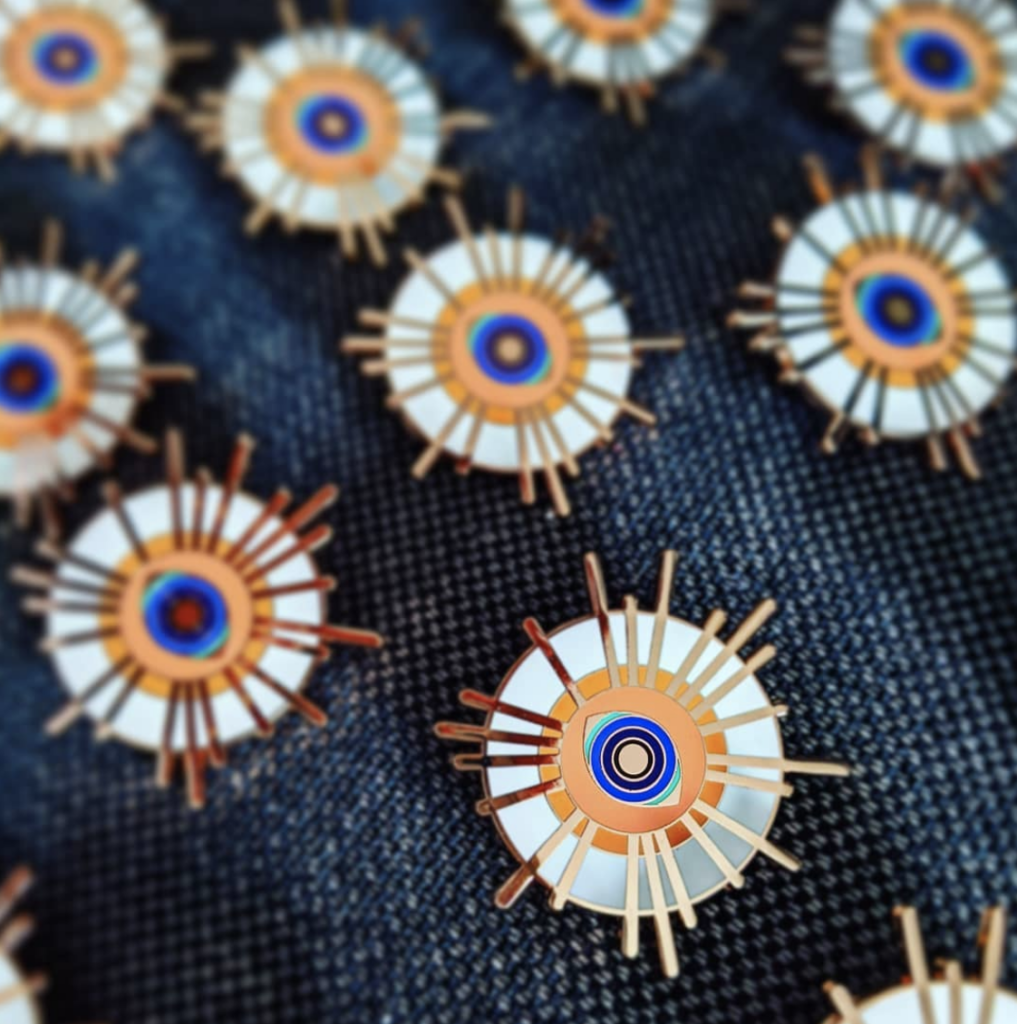
There IS one last thing to make note of when designing pins. They can come with ALL KINDS of bells & whistles and sometimes those bells & whistles are just really fun and funky little gimmicks. But watch out, they WILL hurt your wallet.
Size Matters — the bigger you go the more $$$ it costs. The average pin hovers at about 1.5-1.75 inches. I really like tiny little 0.75 & 1 inch pins. Anything past 2 inches is an absolute BEAST but can look freaking sick when done well.
Colours of the Rainbow — we all know colour is a wonderful and beautiful thing– however, the more colours you add to your pin the more costly she will be. Limited pallets are your friend here. Play up metal surfaces they can make a pin really stand out from the crowd!
Cut-Ins — Ohhh these can look so cool but wow they can also cut into your budget! These pair really well with limited pallets. You definitely have to go into a pin design keeping these in mind. Admittedly, though, they are probably the least expensive fancy addition you can embellish your design with!
I’m not going into detail for all the other bells & whistles you can do with these but here’s a quick run down of a few more things you can look into: screenprinting (prints overtop the enamel), windows (use transparent enamel to create windows), spinning, hinges, glitter, glow in the dark–
Essentially, pins are a REALLY flexible medium to express yourself in and definitely worth looking into if it piques your curiosity, the only limits you really have are your budget.
That’s it for the makers, get outta here and get making some fancy brooches~
For the Collectors
I see you, I hear you, I feel you. There are so many beautiful pins but only so much jacket space, so how the hell do people keep buying these things huh?
Well, I don’t want to enable you folks but there are many different ways to display a pin–shh. I know many of you already know this but there was a time where I, too, had no freaking idea what to do with all these shiny glittery things.
I personally only put my funky little scrungly pins, my thick & beefy and powerful pins on a jacket. The ones that I know can take a beating or have something fun or powerful to say.
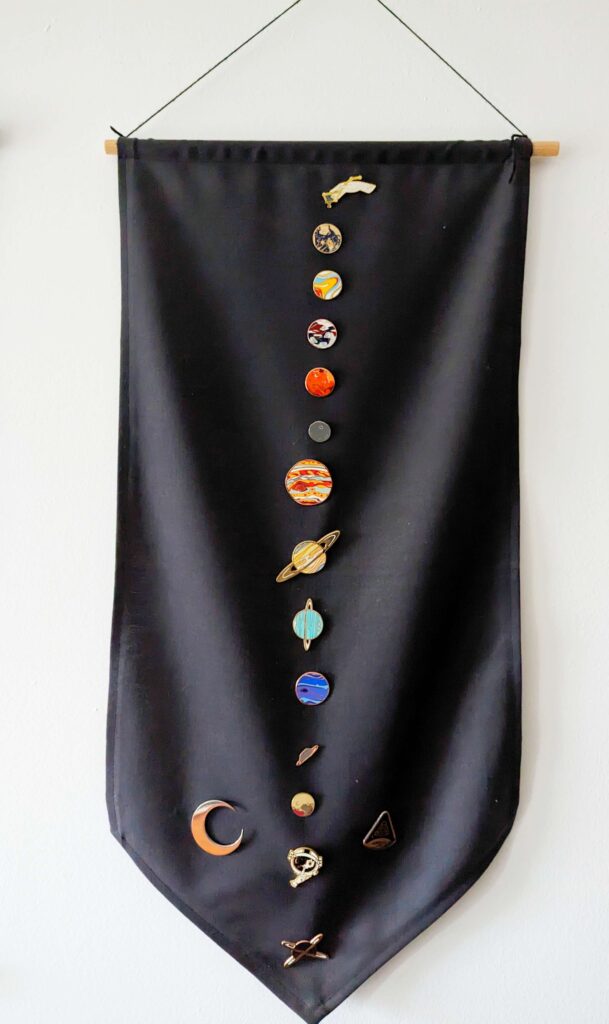
My favourites get meticulously organised into different pin-banners and displayed throughout our tiny apartment thematically organised.
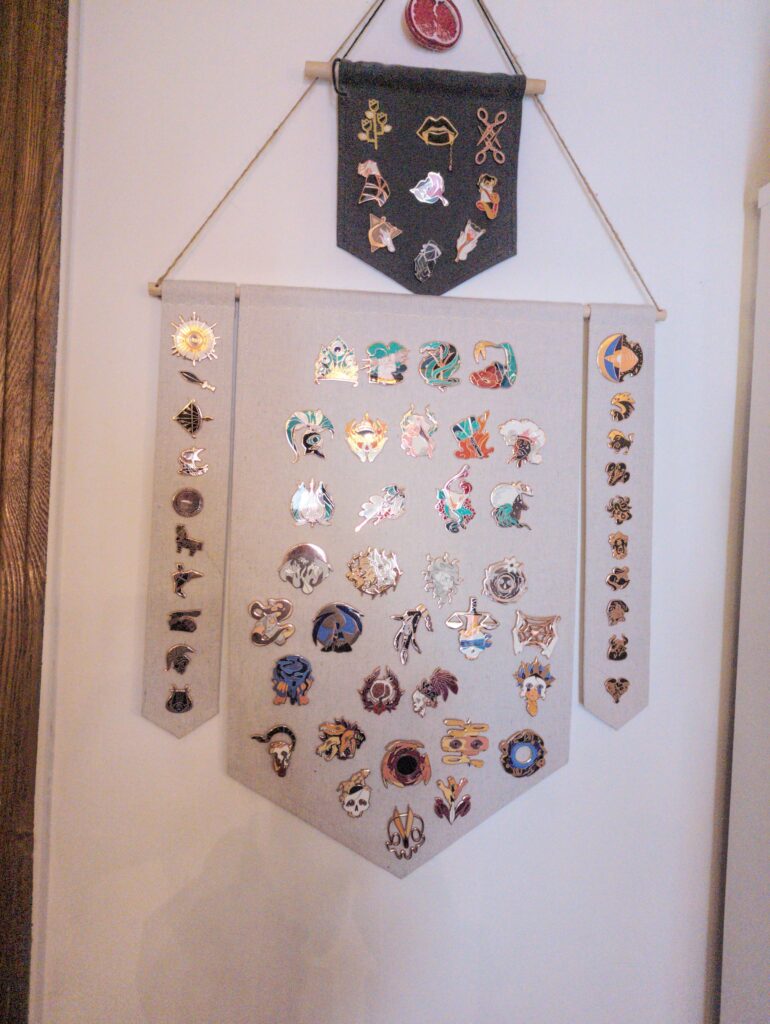
The rest get shoved into clutter and piles with the promise that One Day I will have enough space and enough time and enough money to hang them all up.
So what I’m saying is. I get you. But also thank you for supporting the work that we do with every pin that you pick up <3
I think that’s all I have to say about enamel pins. If you’ve got questions feel free to comment! I try to respond to everything I can and maybe the comments and questions and answers themselves can offer help to those finding this post! Whenever that may be!
Thanks a bundle!
Leave a Reply